Unleash Your Inner Spellcaster: A Complete Guide to the 3D Witch Cat Bookmark SVG Papercut Template
In the ever-evolving world of digital crafting and paper art, few designs capture the imagination quite like the fusion of whimsy and gothic charm. Enter the 3D Witch Cat Bookmark SVG Papercut, a template that is rapidly becoming a staple for crafters, educators, and designers alike. This isn't just another clipart image; it is a meticulously crafted layered file designed to bring depth, dimension, and storytelling to your paper projects. Whether you are looking to create a unique gift for a book lover, add a spooky touch to Halloween decor, or simply explore the capabilities of your cutting machine, this template offers a perfect blend of technical precision and artistic flair.
For those new to papercutting, the prospect of creating a three-dimensional effect can seem daunting. However, with the right tools and a clear guide, anyone can achieve professional-looking results. This article will walk you through everything you need to know about this specific design, from understanding its technical specifications to mastering the assembly process, ensuring that your final product is not just a bookmark, but a piece of wearable or readable art.
Understanding the Anatomy of a 3D Papercut Design
Before diving into the specifics of the witch cat template, it is essential to understand what makes a "3D" papercut different from a standard flat cut. In traditional papercutting, you often deal with single-layer silhouettes. While beautiful, these lack physical depth. A layered papercut, however, uses multiple layers of cardstock stacked on top of one another to create shadows, highlights, and a sense of volume.
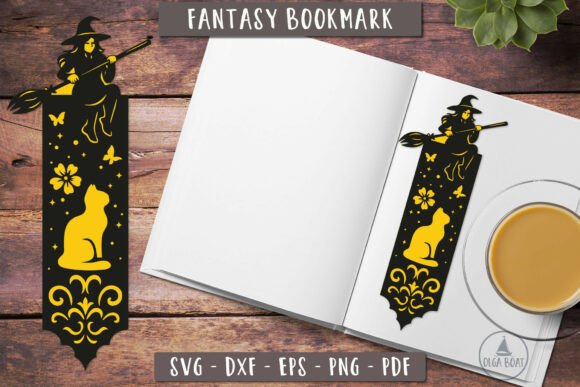
The 3D Witch Cat Bookmark utilizes this technique by separating the design into distinct components: the background silhouette, the cat’s body, the witch’s hat, the broomstick, and perhaps some ambient elements like stars or bats. Each layer is slightly offset or scaled differently, allowing light to interact with the paper in a way that mimics real-world lighting. When assembled correctly, the result is a miniature diorama that pops off the page, adding a tactile element to the simple act of marking a place in a book.
Why Choose a Digital Template?
You might wonder why a digital file is preferable to buying a pre-made physical bookmark. The answer lies in customization and scalability. With a digital template, you control the size, the color palette, and the type of paper used. You can choose heavy-weight cardstock for durability or translucent vellum for a ghostly effect. Furthermore, digital files allow for endless repetition. If you run a small Etsy shop or want to make party favors for a children’s birthday, having the source file means you can produce as many copies as you need without worrying about inventory constraints.
Technical Specifications: What’s Inside the ZIP Archive?
One of the most critical aspects of any digital craft purchase is compatibility. Not all software handles vector graphics equally, which is why high-quality sellers provide multiple formats. The 3D Witch Cat Bookmark template comes packed in a convenient ZIP archive containing five distinct file types, each serving a specific purpose in the creation workflow.
- EPS 10 File: This is a vector format widely supported by professional design software like Adobe Illustrator and CorelDRAW. It allows for infinite scaling without loss of quality, making it ideal if you plan to resize the design significantly or integrate it into larger print layouts.
- SVG File: The Scalable Vector Graphics (SVG) format is the gold standard for home crafting machines like Cricut and Silhouette. It contains the path data needed for the blade to follow, ensuring clean cuts every time. Most modern cutting software imports SVGs directly, making this your go-to file for automated cutting.
- PDF File: Portable Document Format files are excellent for printing. If you prefer hand-cutting with a craft knife or using a printer-friendly layout, the PDF ensures that the lines remain crisp and clear regardless of the device viewing them.
- PNG File: This raster image format is useful for visual reference. It allows you to see exactly how the colors and layers should look when assembled. It’s also handy if you need to upload the design to platforms that do not support vector files, such as certain social media teasers or basic graphic editors.
- DDX File: Often associated with specific cutting software ecosystems (like Design Space for Cricut), this file ensures seamless integration with cloud-based editing tools, saving you time on import and alignment steps.
Resolution and Dimensions: Getting the Scale Right
A common misconception among beginners is that all digital files are created equal. In reality, resolution matters immensely, especially for intricate details like the whiskers of a cat or the brim of a witch’s hat. This template boasts a resolution of 300 DPI (dots per inch) in its raster representations and maintains vector integrity in its scalable formats. This ensures that when you print or cut, the edges are sharp, not pixelated or jagged.
The design is optimized for a length of 8 inches along the long side. This dimension is carefully chosen because it fits perfectly within the standard dimensions of most hardcover and paperback books while still providing enough surface area for the layered details to shine. An 8-inch bookmark is substantial enough to be noticed but slim enough to slide easily between pages without causing damage to the binding.
Step-by-Step: From File to Finished Product
Creating your 3D Witch Cat Bookmark is a rewarding process that requires patience and attention to detail. Here is a general workflow to help you get started:
- Preparation: Unzip your archive and organize the files. Select the SVG or DDX file depending on your cutting machine. Load your cardstock onto the cutting mat. For a true 3D effect, consider using at least two or three different shades of black, grey, or dark purple cardstock to create contrast between the layers.
- Cutting: Send the file to your cutter. Ensure your blade pressure is set correctly for the thickness of your paper. Intricate parts, such as the cat’s tail or the broom bristles, may require slower cutting speeds for cleaner results.
- Weeding: Once cutting is complete, remove the excess material (weeding). Be gentle with delicate pieces. Using tweezers can help lift tiny shards of paper without tearing them.
- Assembly: This is where the magic happens. Apply adhesive to the back of each layer. Start with the largest background layer and work your way up to the smallest foreground elements. Use foam tape or glue dots between major layers to enhance the 3D pop, rather than flat adhesive alone.
- Finishing Touches: Allow the glue to dry completely before handling. You can now slip your creation into a favorite novel or display it on a desk as a standalone ornament.
Practical Applications Beyond Bookmarks
While marketed as a bookmark, the versatility of the 3D Witch Cat SVG extends far beyond reading aids. Its compact size and thematic appeal make it an excellent candidate for various creative projects:
- Halloween Decorations: String several bookmarks together to create a garland for a party. They can also serve as unique tags for trick-or-treat bags.
- Educational Tools: Teachers can use these templates in art classes to teach students about layering, spatial awareness, and the history of papercutting. The theme provides a fun entry point into discussing folklore and mythology.
- Small Business Products: If you sell handmade goods, these bookmarks make low-cost, high-perceived-value items. They pair well with tea sales, candle bundles, or other cozy-themed products.
- Greeting Cards: Attach a smaller version of the design to the front of a greeting card for a recipient who loves cats or the occult. The 3D aspect adds a delightful surprise upon opening the card.
Common Misunderstandings and Tips for Success
Many first-time users assume that 3D papercuts are difficult to assemble. In truth, with a well-designed template like this one, the process is straightforward. The key is organization. Label your layers as you cut them (e.g., Layer 1, Layer 2) so you don’t mix up the order during assembly. Another common error is using paper that is too thin. While standard copy paper works for practice, it lacks the stiffness needed to hold the 3D shape. Aim for cardstock between 110lb and 120lb weight for the best structural integrity.
Additionally, ensure your cutting machine’s calibration is accurate. If the layers do not align perfectly, the 3D illusion will break. Test cuts on scrap paper are always recommended before committing to your final materials.
Conclusion
The 3D Witch Cat Bookmark SVG Papercut template is more than just a digital download; it is an invitation to slow down and engage in the tactile joy of creation. By providing a comprehensive suite of file formats, precise dimensions, and high-resolution details, this template empowers crafters of all skill levels to produce stunning, dimensional art. Whether you are a seasoned pro looking to expand your portfolio or a beginner eager to try your first layered project, this design offers a magical experience that bridges the gap between technology and traditional craftsmanship. Embrace the spell, cut with care, and watch your paper come to life.